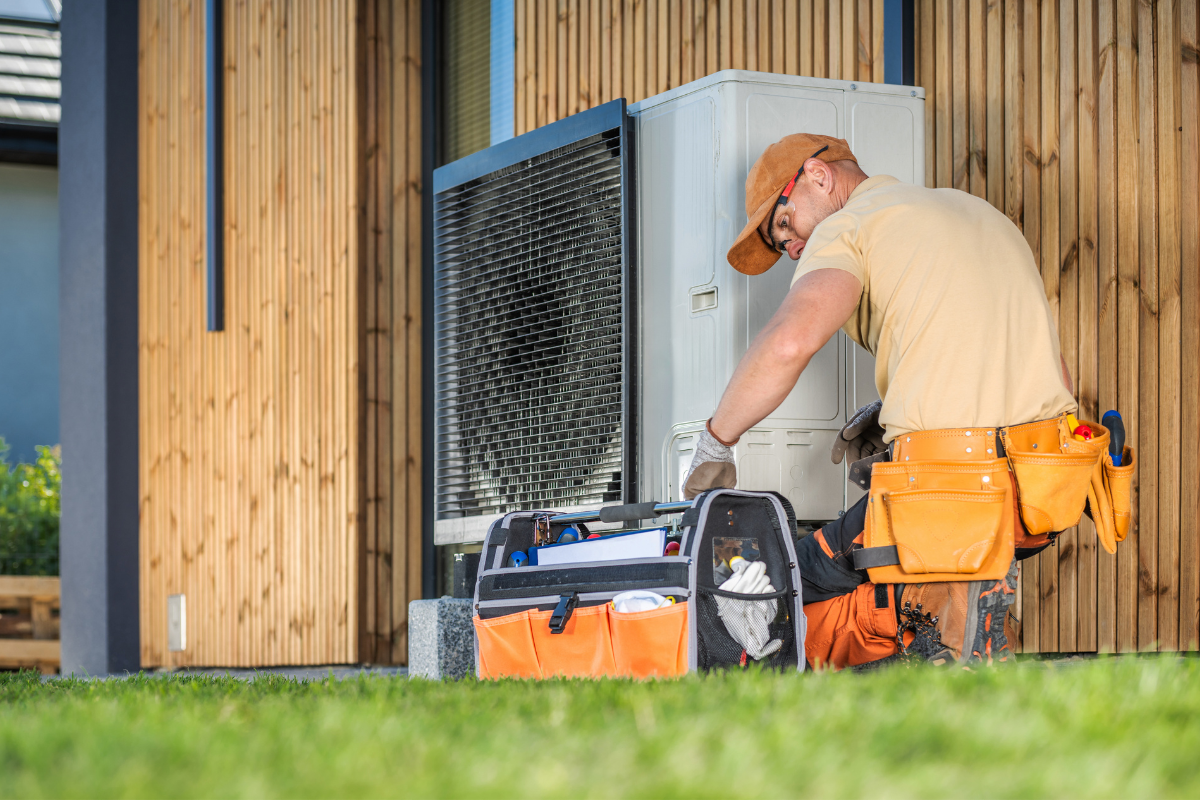
Gas work rewards patience and punishes shortcuts. That truth shows up on bitter nights when a new furnace refuses to light, and in quiet mornings when a homeowner notices the faint, metallic whisper of a leak. Over the years, I’ve seen the same pattern repeat: flawless heating system installation paired with hasty gas piping undermines performance, safety, and the installer’s reputation. Done right, gas line work is methodical and unglamorous, with careful planning, measured torque, and a stopwatch on a pressure test. Here is how professionals approach it during heating unit installation or heating replacement, and where judgment matters more than any checklist.
Why the gas line deserves front-row attention
Heating equipment has become more efficient and sophisticated, yet the gas side often receives less thought than the venting and controls. That’s a mistake. Proper gas piping directly affects combustion quality, longevity of the heat exchanger, noise levels, and energy efficiency. Undersized lines starve burners and induce nuisance lockouts. Sloppy materials or workmanship introduce leaks that show up months later under seasonal expansion. Even routing choices matter. Put a drip leg in the wrong place and you invite debris into sensitive valves. Installers who understand fueling treat it as a system, not a mere connection.
Local codes set the floor, not the ceiling
Codes vary by jurisdiction, but the themes are consistent: correct materials, correct sizing, accessible shutoffs, proper support, and documented testing. Some areas adopt the International Fuel Gas Code, others use NFPA 54 with local amendments. Utilities add their own standards, like meter placement clearances or regulator requirements. Those documents represent the minimum. Experienced installers build beyond them where the real world demands it. For instance, code might allow a long offset with multiple fittings at the far end of a run. On paper it works. In practice, repeated 90s on a borderline pipe size can cause sluggish ignition with a two-stage furnace that ramps quickly. Good judgment means sizing up or reducing the number of fittings even when the book says you’re within limits.
Scoping the job: pre-work that pays off later
Before a single wrench comes out, walk the site with a plan. Consider the layout from the meter or propane tank to the heating unit. Note other appliances on the manifold and their cumulative demand. Look for choke points like tight joist bays or congested mechanical rooms. If this is a heating replacement where an 80 percent furnace is becoming a 95 percent modulating unit, expect a different gas profile. High-efficiency modulating systems may sip gas at low fire but can draw substantial volume at high fire, especially in cold snaps.
I like to gather a few numbers early. Line lengths to likely branches, number and type of fittings, appliance input ratings, elevation above sea level, and supply pressure from the utility or tank regulator. These shape material choice and pipe size. Many problems are solved at this stage, on paper and with a tape measure, rather than under a beam with a miscut section of pipe.
Material choices and when each makes sense
Several materials are common in residential and light commercial gas lines. Each has merits and quirks that influence installation technique and reliability.
Black steel remains a workhorse. It is durable, tolerates abuse, and gives predictable flow characteristics. Threaded joints require attention to sealants and torque. You must cut clean threads and ream the bore to avoid restricting flow. Black steel excels in exposed basements and mechanical rooms where supports and drips are easy to install. It is heavier, and threading on tight retrofits can be slow.
CSST, which is corrugated stainless steel tubing with a protective jacket, speeds installation around obstacles and reduces threaded joints. Its flexibility can save hours running through finished spaces. However, it demands manufacturer-specific fittings, strict bonding to deal with transient electrical energy, and careful routing to prevent kinking or damage from fasteners. Not all CSST is equal; newer jacket designs improve arc resistance, but bonding requirements still apply.
Copper is sometimes allowed for gas in certain jurisdictions when marked appropriately and paired with the correct flare fittings. Many areas prohibit it due to concerns with sulfur reacting with copper or the potential for work-hardening. Know your local code and utility stance.
Polyethylene (PE) piping is common underground, transitioning to steel above grade with approved anodeless risers. This matters when extending service to outbuildings or outdoor equipment. Underground work brings different requirements for burial depth, tracer wire, and corrosion protection.
In mixed systems, transitions must use listed fittings and occur in accessible locations. If you change from CSST to steel near a furnace, leave space for service. That six inches of breathing room behind a gas valve feels luxurious when you need to swap it during a winter service call.
Sizing the gas lines with real-world margins
Textbook sizing starts with the total BTU input of connected appliances, adjusted for supply pressure and gas type. Add the furnace or boiler, water heater, range, dryer, and any fireplaces. Then map the piping layout, calculate equivalent lengths using fitting factors, and choose diameters from a sizing chart for natural gas or propane. That part is standard. Where experience helps is in applying margin. I rarely size to the exact edge of a chart. Elevation, line aging, and unplanned appliance additions will erode that cushion. If a run is long or peppered with fittings, size up one diameter. The difference in cost is modest compared to the stability it brings during high demand.
Another nuance arises with two-stage or modulating furnaces. At low fire, some systems are sensitive to pressure fluctuations from competing appliances. If a water heater or stove fires and the manifold pressure dips, you might hear a furnace ramp oscillate or see pressure switches flirt with limits. Heavier pipe and simpler routing can steady the supply. During heating system installation, I model the worst-case scenario: all major appliances running, lowest expected inlet pressure at the meter, and an ambient temperature that would drive peak heating. If the math looks tight, I open the pipe.
Placement and design of valves, unions, and drip legs
There is a rhythm to a clean furnace gas connection. Start with a full-port shutoff valve in the same room, upstream of a union that allows removal of the appliance without fighting the valve. Past the union, install a sediment trap, often called a drip leg, oriented to catch debris and condensate before the gas valve. That trap should sit in a vertical run with a capped bottom. Put a short nipple below the tee so material has somewhere to collect. This arrangement matters more on older lines with scale or on systems that recently saw pipe work where cutting oil might have migrated. You would be surprised what ends up in those legs.
Flexible appliance connectors may be permitted between the rigid line and the appliance connection, depending on local rules and the manufacturer’s instructions. If used, choose a connector rated for the appliance BTU and avoid sharp bends or torsion. Personally, I prefer a rigid final run where space allows, especially on equipment with sensitive gas valves.
Service clearances also matter. Leave room to access the union and the trap. In tight closets, that can mean reconfiguring piping or relocating the shutoff. Think about the service technician who comes later with a manometer and two hands full of fittings. Good layouts save time and reduce mistakes.
Working with thread sealants and torque like a pro
Threaded joints fail more from poor technique than bad materials. The key steps are consistent. After cutting threads, ream the inside to remove burrs. Clean the threads. Apply sealant rated for gas, such as a high-quality pipe dope approved for natural gas or propane. PTFE tape can be acceptable if code and manufacturer allow, but I treat it as a supplement with dope applied over the tape. Never use excessive https://mariogtqo159.cavandoragh.org/safety-tips-for-your-heating-unit-installation-day layers of tape, and do not start the tape on the first thread to avoid shredding material into the pipe.
Torque should be firm and final, not exploratory. Over-tightening can crack fittings or distort threads, which leads to micro-leaks that only show under thermal cycles. Under-tightening is equally risky. A steady hand and experience guide the feel, but backing up joints with a second wrench to avoid twisting downstream piping is non-negotiable. I’ve seen entire assemblies stressed into a leak because the installer wrenched against a long run without a backup wrench.
Support and protection: gravity and movement never rest
Gas lines need support to prevent sagging and to absorb vibration from appliances. Follow support spacing for the material you use. Steel generally needs hangers every 6 to 8 feet, CSST per manufacturer guidance, often closer. Use straps that do not cut or pinch, and keep lines protected where they pass through framing. In garages or basements where the line is exposed, consider shield plates, especially near the first couple of studs after a meter penetration. If a homeowner or contractor later drives a lag into a stud and finds the pipe, everyone loses.
Anchor points also help control thermal expansion and contraction. Lines that travel through crawl spaces can move across seasons. Secure them well near fittings, yet allow controlled movement along straight runs with slotted hangers or cushion clamps. If you hear ticking or popping when appliances fire and extinguish, suspect expansion rubbing against framing.
Pressure testing and leak verification that will stand up in court
Testing should be boring and methodical. Start with a shutoff at the meter and isolate the gas line section to be tested. Use a calibrated pressure gauge with resolution appropriate for the test pressure. For new installations, many codes require a higher static pressure test with air or inert gas, often 10 to 15 psi held for a set time such as 15 minutes or longer, with no measurable drop. For repairs or appliance connections, a lower pressure test and a soapy solution leak check might be acceptable. I prefer to soap every joint even after a pass on the gauge. Micro-bubbles reveal what a needle sometimes misses.
Never test a gas valve or appliance regulator with high pressure. Isolate them. Pressure can damage diaphragms and void warranties. I once consulted on a string of early valve failures on a hydronic boiler line. The cause turned out to be repeated high-pressure tests across the valve during rough trades, each one nicking the regulator seat microscopically. The system would pass on day one, then develop a slow leak weeks later.
Electronic leak detectors are useful, especially in tight quarters or painted spaces where soap is messy, but they are not a substitute for a pressure test. Drafts and cross-sensitivities can give false positives. Use them as a second set of eyes.
Purging and commissioning without drama
Once the line passes pressure testing, purge air slowly. Rapid opening of a gas valve into a line filled with air can produce combustible mixtures in equipment, or trip flame safeguards repeatedly. For long runs, crack the union or an upstream test port, vent outside or into a safe area, and use a combustible gas indicator if available. With natural gas, you typically smell the mercaptan quickly. With propane, odor intensity varies with temperature and tank fill level, so be patient.
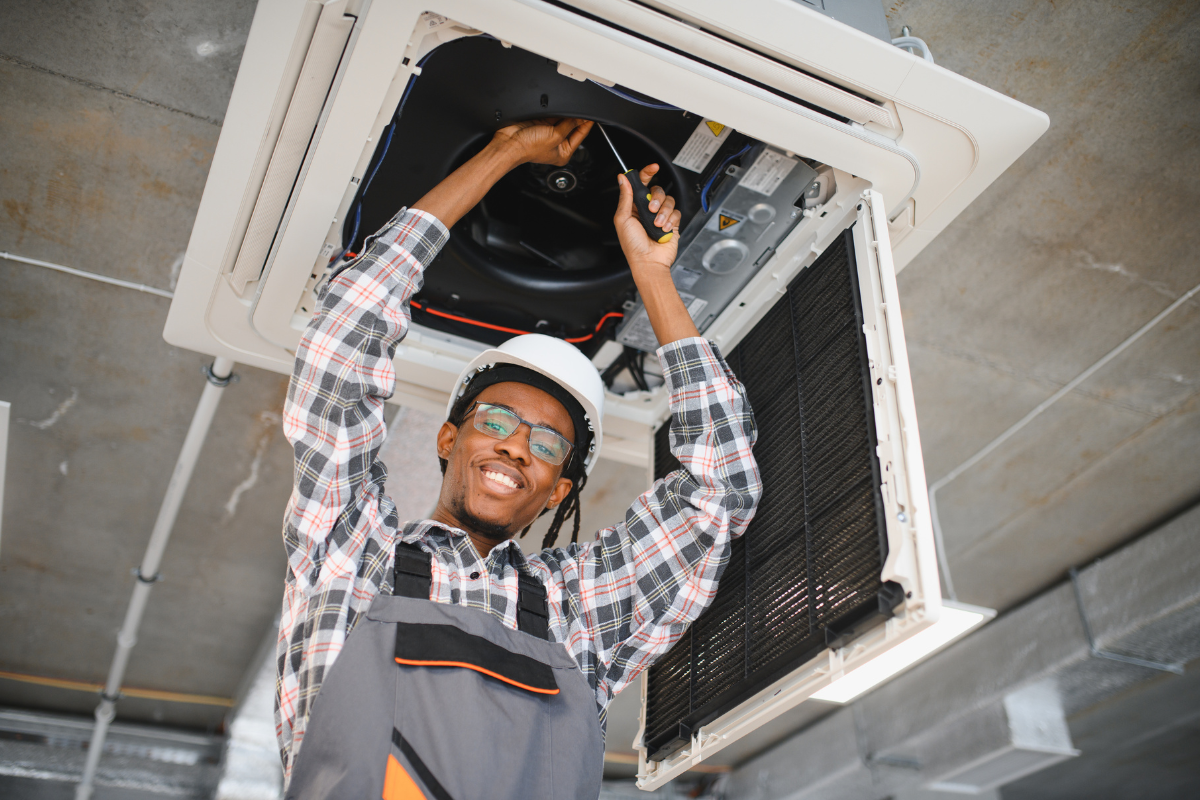
When lighting the heating unit for the first time, monitor inlet and manifold pressure with a manometer. Compare to the manufacturer’s specified range at low and high fire. Adjust the gas valve only if required by the installation instructions. If manifold pressure dips below spec when other appliances fire, reassess line sizing or regulator settings. Do not compensate for undersized piping with valve tweaks. That trade just relocates the problem and risks incomplete combustion.
Venting and combustion air intersect with gas delivery
Although this piece focuses on the fuel side, venting and combustion air pull on the same thread. A poorly vented appliance or a sealed mechanical room starves combustion and can mimic gas supply issues. Negative building pressure, common in tight homes with powerful exhaust fans, can cause flame instability. During heating unit installation, verify that combustion air openings are sized and located to code. On sealed-combustion high-efficiency units, check intake and exhaust terminations for clearances and proper slope to handle condensate. Stable combustion makes gas pressure measurements more meaningful.
Special considerations for propane systems
Propane systems run at different pressures and behave differently in cold weather. Tank regulators can deliver around 11 inches water column under normal conditions, but at very low temperatures supply pressure can sag, especially on small tanks feeding high-demand appliances. Line sizing must take vaporization capacity into account, and that may translate into larger tanks, twin-tank setups, or heated regulator enclosures in extreme climates.
Propane is heavier than air, so leak behavior changes. Low spots accumulate gas. In basements or pits, treat leaks with urgency and ventilate at floor level. Propane typically uses flare fittings on appliance connectors, and thread sealants go on male threads only where they form the sealing surface per fitting design. Do not put tape on flare faces.
Seismic, flood, and other environmental realities
In seismic regions, consider flexible sections and seismic shutoff valves that trip on significant motion. Properly braced rigid piping reduces the chance of joint damage. In flood-prone areas, keep valves and unions above the likely water line. After a flood, replace any regulator or valve that was submerged. Corrosion after a flood often appears months later, so documentation matters.
Exterior runs along foundations face UV, cold, and curious weed trimmers. Use coated steel, paint exposed steel with a rust-inhibiting finish, and maintain clearances from windows, vents, and electrical equipment per code. Where lines enter buildings, seal penetrations against pests and air infiltration without encasing the pipe in materials that trap moisture against steel.
Documentation and communication that prevent future headaches
Good gas work survives not only the first season, but the next technician’s questions. Mark the BTU ratings and pipe sizes on a schematic taped near the furnace. Label shutoffs for each appliance on the manifold. Note the test pressure, duration, and gauge type used. Take photos of hidden runs before drywall closes. When the homeowner adds a range or outdoor heater later, that record prevents guesswork and helps decide whether the line can handle extra load.
I tell clients during heating replacement that a change in appliance lineup might require gas line modifications. People often assume the gas side is infinite. A clear explanation and a diagram set expectations and protect the installer from blame when a future upgrade requires pipe changes.
Common pitfalls and how to avoid them
A few mistakes appear again and again. Rushing the pressure test is the most common. A well-run test takes time, and if you are waiting in a cold basement watching a needle, it is tempting to call it early. Resist that. Another is installing a drip leg but placing it horizontally, which defeats its purpose. Using the wrong sealant on CSST fittings, or mixing brands of CSST components, creates hidden failure points. Running gas lines in return air plenums without addressing code requirements is a big red flag. Finally, ignoring bonding on CSST invites lightning-related damage. Bonding clamps and a dedicated conductor to the electrical service grounding system are not optional if the manufacturer requires them.
Bringing it together during a heating system installation
A tidy, code-compliant gas line is part of a successful heating unit installation. The installer’s mindset matters as much as the measurements. Think about future service. Plan for peak demand. Protect against the careless screw into a stud. Test with rigor. If you approach the gas side with the same seriousness you give to venting and combustion setup, the equipment pays you back with stable flame, quiet starts, and fewer callbacks.
Below is a compact field checklist that captures the essentials for day-of installation without replacing your local code book or manufacturer instructions.
- Verify total connected BTU load and pipe sizing with margin for fittings and future additions. Choose materials based on route and code, and bond CSST per manufacturer requirements. Install shutoff, union, and correctly oriented drip leg at the appliance with service access. Support and protect lines at required intervals, shield penetrations, and avoid plenum conflicts. Perform documented pressure testing, soap all joints, purge safely, and commission with a manometer.
When to call the utility or an inspector early
On jobs where meter capacity looks marginal, call the utility before you cut. Meters and upstream regulators often limit flow more than branch piping. If the utility expects heavy winter demand in your area, they may prefer larger meters or regulator adjustments. Similarly, schedule inspections with enough slack to correct issues without compressing your timeline. A failed inspection at the end of a heating replacement frustrates everyone, especially if the homeowner expected heat that evening.
Inspectors are not the enemy. They see dozens of installations a month and bring a perspective that can improve your practice. I once had an inspector flag a neatly hidden union inside a finished chase that I considered accessible through a small panel. He asked a simple question: could a technician replace it without cutting drywall? The answer was no. We moved it. A season later, that same line needed rework after a remodeling change, and the accessible union saved hours.
Final thoughts from the field
Gas line work is the quiet backbone of heating system installation. It rarely wins praise unless it fails. Yet, the steady burn of a well-fed appliance can be traced back to the installer who measured twice, sized up once, and tightened each joint with the right touch. If you build your process around planning, proper materials, conservative sizing, clean assemblies, and relentless testing, your installations will run safely and predictably. Homeowners will not notice the gas piping, and that is exactly the point.
Mastertech Heating & Cooling Corp
Address: 139-27 Queens Blvd, Jamaica, NY 11435
Phone: (516) 203-7489
Website: https://mastertechserviceny.com/